Blog
Tutorial: Blogs
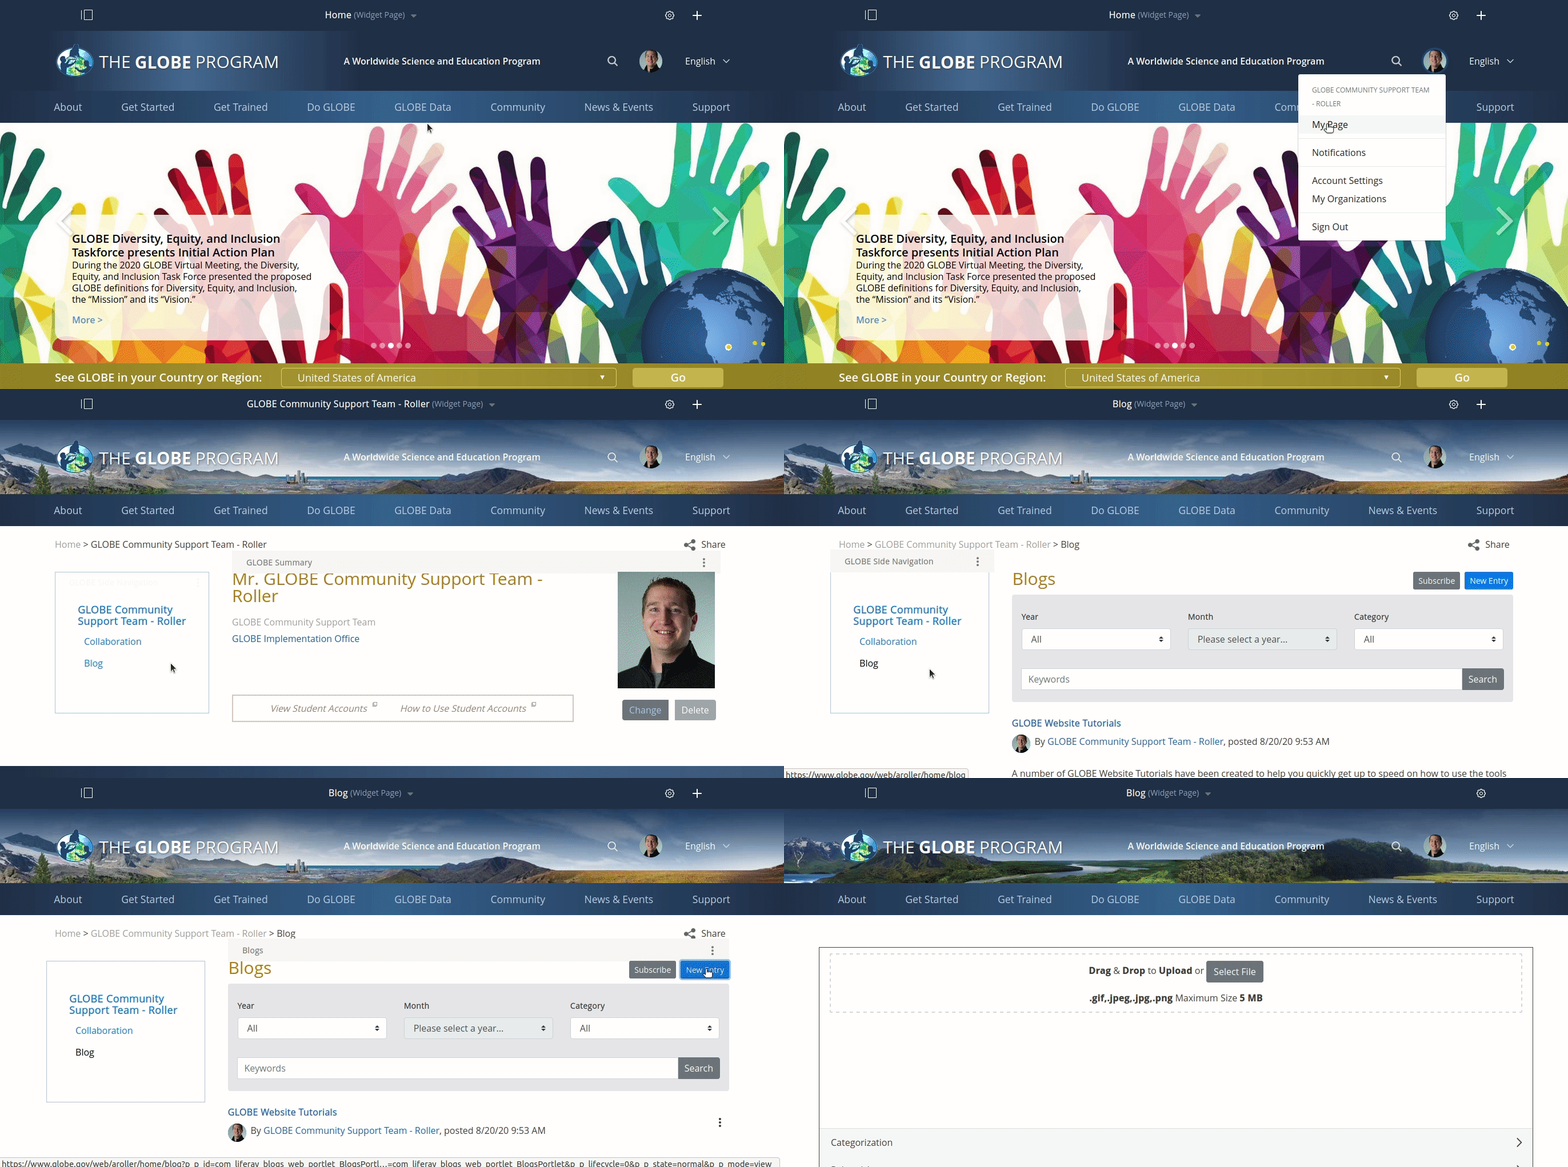
Create a New Blog Post
- Log in to the GLOBE.gov website
- At the top of the page, on the right, click on your profile picture
- Select "My Page"
- On the left of the page, in the navigation menu, select "Blog"
- On the right of the page, select "New Entry"

Write & Publish Your Blog Post
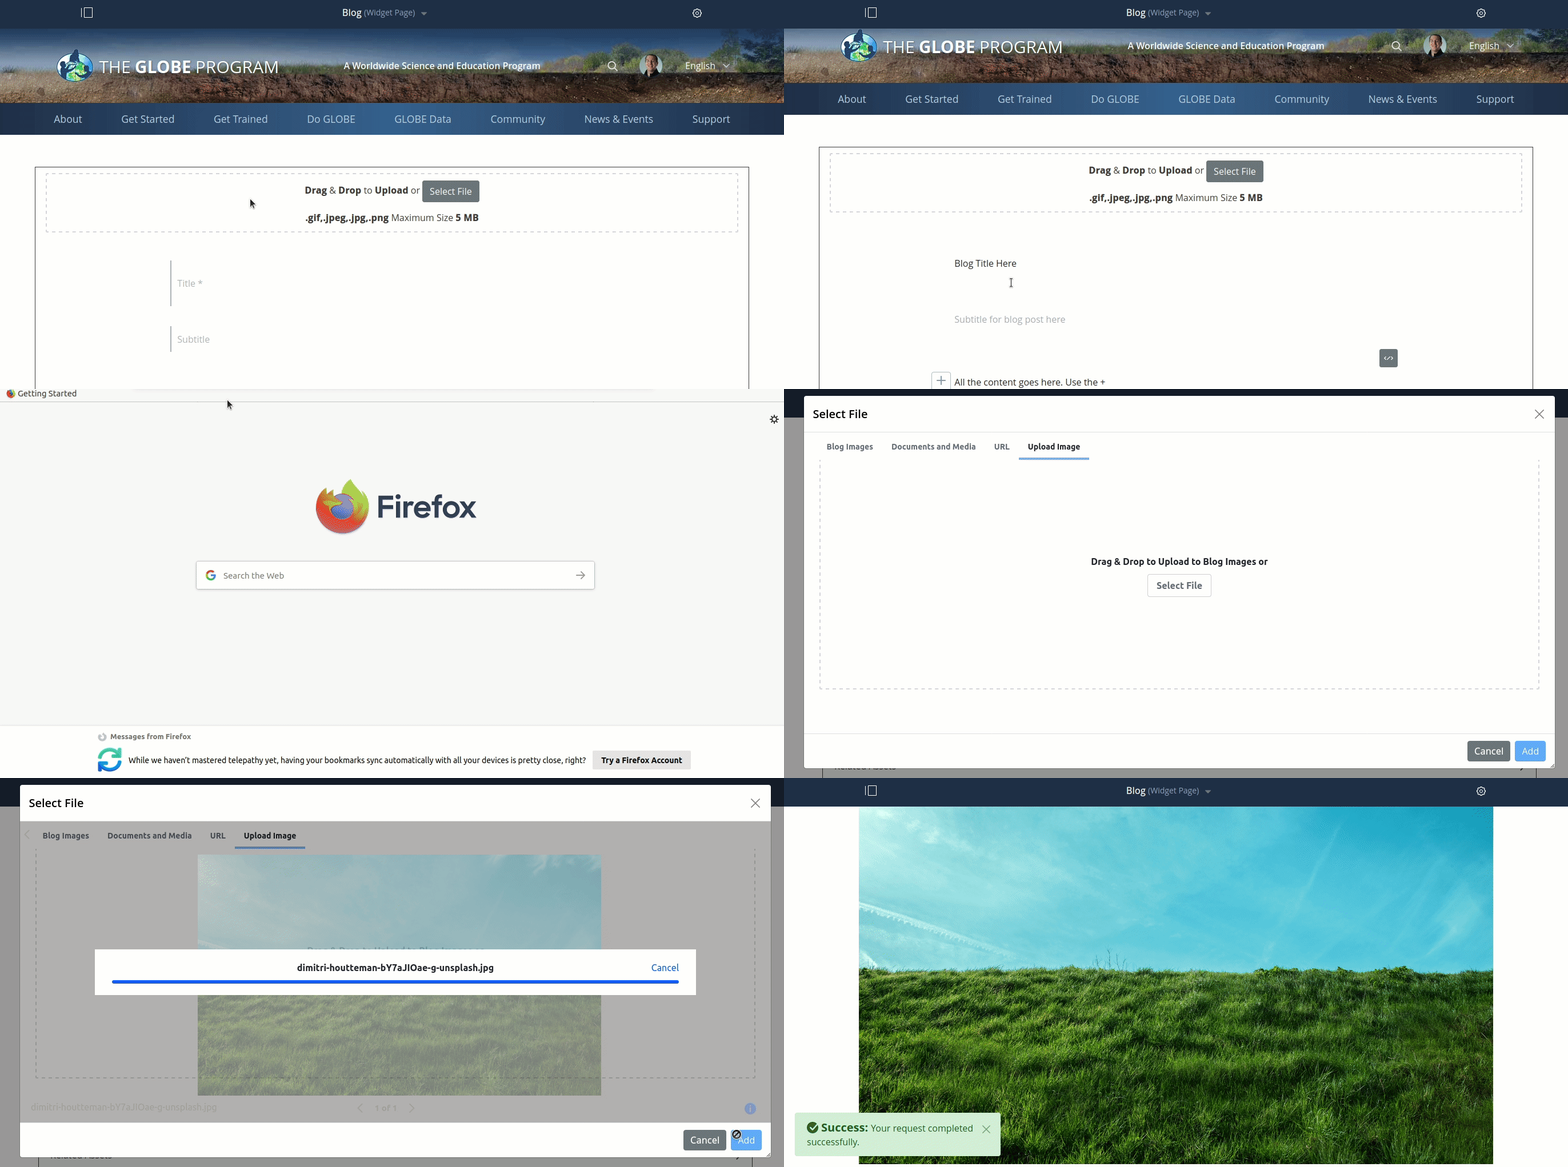
- On the blog post editor page, type in your blog title, subtitle, and blog content
- At the bottom of the page, on the left, select "Publish"
Add a Photo to Your Blog
- In the body of the blog post, select the "+" icon to the left of the blog content
- In the popup, on the left, select the "Insert image" icon
- At the top of the screen, select the Upload Image tab
- Click "Select File"
- Select the image file you want to upload
- On the bottom right, select "Add"
Tip: You can also add a header image for your post by clicking "Select File" in the box above the blog title.


